Fermented Foods: A Shortcut To A Healthy Gut
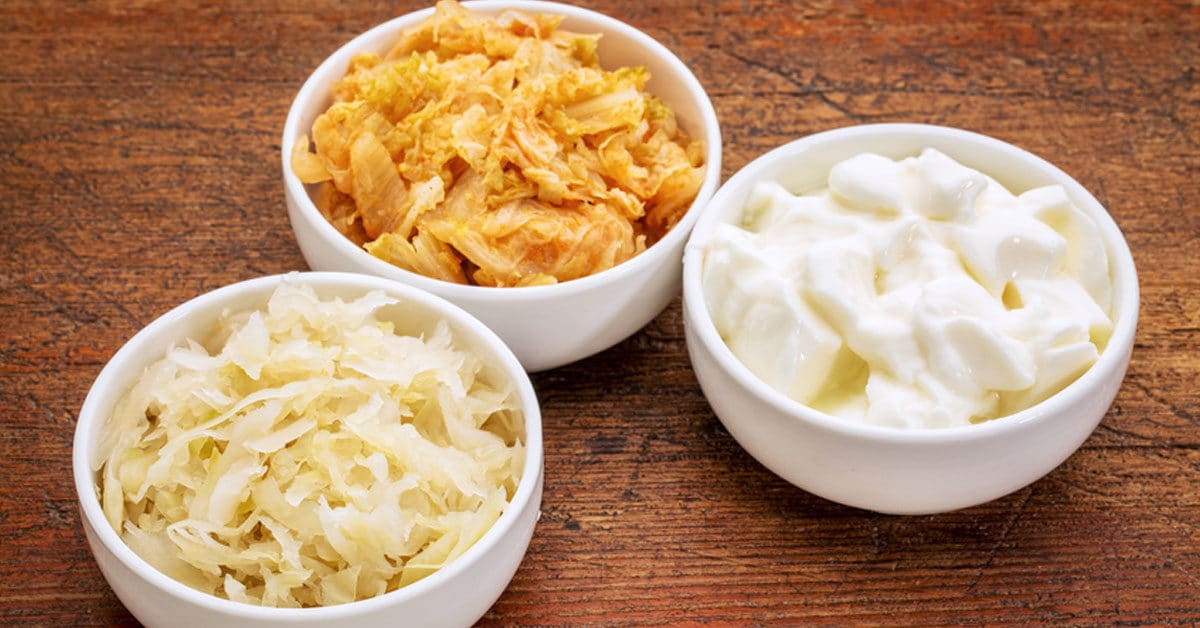
Are all fermented foods good for your health? This is a question that often comes up when people begin to overhaul their diet and introduce foods they may not have tried before. The category of probiotic foods includes things like sauerkraut, apple cider vinegar, kombucha, kefir, and yogurt, along with foods like kimchi or kvass that are less common in North America. So are all of these foods good for your health? Like many things in medicine, the answer is … it depends!
Fermented foods can play a really important role in rebalancing the gut flora and recovering from gut imbalances like Candida. However, every fermented food is different. Evaluating each one means looking at what has (or hasn’t) been done to it and what has (or hasn’t) been added to it. Let’s explore in greater detail what that means, and what you need to watch for it when it comes to fermented foods.
Fermentation & Food — Understanding The Basics
There are a number of ways to ferment foods, including acetic acid fermentation, alkaline fermentation, and more. However, fermented foods are usually (but not always) produced using one of these two methods:
- Fermenting sugar with yeast to produce sugar alcohols; OR
- Using lactic acid-based bacteria (e.g. lactobacillus) to act on dairy products or vegetables, which aids in their preservation and increases their good probiotic content. (In the case of Candida, this second method is particularly useful).
However, many mass-produced ‘fermented foods’ nowadays unfortunately have little actual ‘fermentation’ left in them (i.e. lacto-acidic beneficial bacteria). This is due to the range of added sugars, preservatives, colorings, or cheap vinegars used. These additives are used in place of a real fermentation process. Typical examples are the sauerkraut, kimchi, and olives that you find in your local supermarket. Additionally, many yogurts contain no probiotic bacteria at all by the time they reach the shelves!
When produced this way, these foods will give you virtually no beneficial bacteria. As you know, ‘good bacteria’ are incredibly important to maintain healthy digestion, regulate intestinal pH, and ‘out-compete’ pathogens like Candida for space in the gut. Meanwhile, the added sugars and preservatives like sodium benzoate place stress on your digestive system and the rest of your body. Foods like these are not really fermented, and are nowhere near as beneficial for your health as real fermented foods can be.
True fermented foods typically contain substantial amounts of lactic acid producing probiotic bacteria. These bacteria thrive during the fermentation process and give the fermented food its characteristic flavor.
I should add a note of warning here. Eating large amounts of fermented foods is not so different from taking large amounts of probiotic supplements. If you go too fast with these foods, they can lead to a Herxheimer reaction (i.e. Candida die-off) in those already dealing with a Candida overgrowth. In other words, don’t rush in and eat 3 bowls of sauerkraut! Pace yourself and start with small servings of one or two fermented foods per day, especially if you suspect that you are dealing with a Candida infestation.
So, which fermented foods should you actually be eating? Let’s take a look at the key things you should watch out for when selecting (or making) your fermented foods.
Beneficial Fermented Food Options
Making your own fermented foods is almost always the best option, if you have the time and motivation to do it. It’s easier than you probably realize, and this way you can control the process and the ingredients completely. A great resource on the topic is The Art of Fermentation by Sandor Katz.
If you don’t have the time or inclination to ferment your own foods, don’t worry! There are plenty of healthy options available to buy. Consider the following tips as guidelines for helping you choose and consume healthy, Candida-fighting fermented foods:
- Look for foods with no sugar added.
As you know, excess sugars will feed a Candida overgrowth. Fermented foods will typically have some residual sweetness from the natural sugars that remain in the food, so there should be no need to sweeten them further. - Look for organic ingredients.
A Candida overgrowth means that your liver is already overworked, so the last thing you should do is add extra pesticides and chemicals for it to metabolize. Furthermore, organic produce tends to be higher in nutrient content, so you’ll get more nutrition out of each bite! Great fermented food options that can be certified organic include:- Sauerkraut
- Kimchi
- Yogurt
- Kefir
- Kombucha (be careful with this, as the sugar content can be too high in some cases)
- Pickles
- Olives
- Go unpasteurized (particularly with fermented vegetables and dairy).
Processes like pasteurization and sterilization kill the beneficial bacteria. Even if bacteria are added back in and cultured after pasteurization, remember the enzymes in the food are still destroyed by pasteurizing. Those enzymes help you to digest foods more easily. For someone with Candida overgrowth who is likely already experiencing digestive problems, pasteurization makes foods harder to digest and much less beneficial. - Avoid added alcohol (although small amounts produced during the fermentation process are generally ok).
Alcohol is a liver toxin, and remember that Candida is already producing potent toxins like acetaldehyde. You definitely don’t want to add to your body’s toxic burden. There are lots of good reasons to quit alcohol during your Candida treatment. - Consume your fermented foods along with fatty and protein-rich foods.
Fatty and protein-rich foods tend to inhibit the natural production of beneficial lactobacillus bacteria in the gut. To offset this, it makes sense to eat a small portion of fermented foods at the same time. In your Candida diet, this may be things like meats, nuts, eggs, etc.
3-Month Candida Elimination Kit Start Your 3-month Candida Cleanse
This Candida Kit contains all the supplements recommended on the Candida Diet:
- LIVER ONE to process and remove the toxins created by Candida.
- CANDASSIST to inhibit and weaken the Candida colonies in your gut.
- PROBIOTIC to replace the Candida yeast with probiotic bacteria.
Plus... the CANDIDA DIET RECIPE BOOK with 50+ low-sugar recipes

Many thanks for all your emails. They have been so helpful to start me off on my Candidia diet and re evaluate my diet in general. I have been on the diet now for ten days and already feel so much better. I had Candida 15 years ago and was living in Hong Kong… how things have changed since then with help on the Internet. Many thanks. Carol
Thanks for the good advice! When I subscribed I thought I had candidiasis in my mouth. A stomatologist diagnosed oral liquen planus but still I try to follow the candida diet because I think it improves the burn in my tongue and palate.
I am confused by #5…
5. Consume your fermented foods along with fatty and protein-rich foods.
Fatty and protein-rich foods tend to inhibit the natural production of beneficial lactobacillus bacteria in the gut. To offset this, it makes sense to eat a small portion of fermented foods at the same time. In your Candida diet, this may be things like meats, nuts, eggs, etc.
Do consume fatty and protein-rich foods? or Do not?
Thanks for this article.. It was very helpful
Hi Roseann, when large amounts of fat and protein are digested they tend to increase ammonia levels in the gut. Taking probiotics with them is a good ‘insurance policy’ to maintain an appropriate gut pH and a healthy gut flora.
Thanks for the info! I may have SIBO, as I had high amounts of d-lactate and other things. Is it still okay to have fermented foods? I’m wondering if the bad bacteria was actually caused from the potato intolerance I didn’t know I had. My tummy has been way better, so maybe I could start some of these fermented foods. I’d love your opinion, as I’ve also had candida issues. Thanks! 🙂
Yes, fermented foods can certainly help with other forms of gut dysbiosis too, including SIBO!
Potatoes are a member of the nightshade family, the other members are: Eggplant aka aubergine, tomatoes and peppers but not chillies. If you are ‘sensitive’ to potatoes you may well react sooner or later to the other 3 members as well.
Tell me more about olives? i read green olives are bad but black are not? thanks
Green olives are just black olives that have been picked earlier 🙂 They are OK, but just avoid the ones in white vinegar.
Are the olives at an olive bar at the grocery store fermented? They are in various different oils and spices. Also, are kalamatas ok?
I’d like to know please why it’s ok to eat kefir and plain yoghurt but not buttermilk?
Isn’t buttermilk also fermented like the other two and doesn’t it also contain probiotics?
You’re absolutely right, buttermilk does contain probiotic bacteria and it is OK to eat. There was a typo which we have corrected 🙂
Sorry another question please.
Is it ok to drink unpasteurized store bought kombucha? I was worried about the sugar content, it tastes very sweet. Also wanted to know if the bacteria and yeasts it contains are beneficial as I have read they are not naturally found in the body and able to colonize the gut like for e.g. The cultures in kefir do.
It depends how long the kombucha has been fermented. If it hasn’t been long enough, there will still be lots of sugars in there. Store-bought brands are often like this because people like the sweet taste. Making homemade kombucha is better. Additionally, be aware that the SCOBY does contain various yeasts (sometimes even Candida albicans!), and some individuals with yeast sensitivity might not react well to it.
Was wondering about kimchi. It contains carrot, which is not allowed and daikon radish which is not mentioned at all. Is it alright to consume it or do I have to make it without the carrot and daikon?
Kimchi with carrot is absolutely fine. Its a small amount, and the sugars are partially fermented anyway.
I am a type O blood type. I am not supposed to eat kefir or fermented foods. I also has candida and don’t know what to do? Any suggestions?
Hi Juli, I don’t personally believe that there is any truth behind the various blood type diets. Are you sure it isn’t another factor, besides blood type, that is causing whatever problems that you are experiencing?
Would like to know why you cannot have fresh pork on this diet?
Thanks
Pork tends to have much higher levels of pathogenic bacteria than other meats, and its quite tough on the digestive system. If you can find pork that has been raised safely and humanely, and you cook it thoroughly, it can be OK in small amounts.
im confused about vinegars and pickles. Can or can we not have them?
You need lacto-fermented pickles, not the typical pickles that you buy in your local store.
Hello I am wondering about water Kefir, since it’s fermented with sugar. Will it help fight against Candida or should I avoid it?
Unless its fermented for a very long time, I think the sugars might be too high.
How long is considered a long time?
I haven’t made water kefir in a long time – sorry, I can’t answer that!
I have a question. Is it possible for someone with candida to consume too many formented foods? I make my own kefir, kefir cheese (strained kefir), kombucha, and sauerkraut and usually have some of each everyday. Can I over do it on probiotics and good bacteria? Would adding a probiotic supplement be overkill?
I have kefir grains and was using coconut milk (in the carton) not the can to make kefir. I worry that the sugar in the processed coconut milk is counteracting the good effects of the kefir. What do you suggest I use instead, milk from the store or do I try to find a local farmer to buy unpasteurized milk from?
Great diet, it has helped me immensely! I have one request – that you include more vegetarian recipes. I’ve been dealing with candida overgrowth since 1980, at which time I presented with migraines. I was told by a specialist to omit peanuts, aged cheese and alcohol from my diet, which was very easy, as I was only a teen at the time. Moving forward eight years later, I was in an automobile accident, which rendered me disabled due to cluster migraines, neck and back pain, weakness, stiffness and immobility. It took many doctors, treatments and years for me to put two and two together and realize CANDIDA was a major player in reeking havoc on my body. I researched and began taking a supplement called Chlorella, discontinued all meds., tweaked my diet and began Atlas Orthogonal.
The diet has been helping me alot! I unfortunately do not have milk kefir grains, no one in my area seems to be giving them. I do have water kefir, would that still help? Also how many bacterias are in milk or water kefir?
Would Miso Soup – the organic & fermented kind be suitable to consume as fermented product while moving from the cleanse, into stage 2 when introducing the probiotics?
Hi Lisa,
Thanks for the generous information on your website.
My favorite locally made, raw kombucha has 35 calories and 8 grams of sugar per serving. I’ve been otherwise avoiding sugar completely. I see they offer another flavor which has only 3 grams of sugar per 8 oz serving. I can at least switch to that, if that’s not too high. I tend to have 1-3 servings daily.
I have made it myself before, but my dog also suffers from candida so I feel like with his shedding and scratching, there is too much yeast in the air at home which could contaminate the kombucha/SCOBY. So I trust store-bought/locally-made more at this point. Perhaps I should be skipping kombucha altogether, though. Thanks for any insights!
Please name me some readyily available fermented foods that I can purchase. I am too ill to prepare y own. I have a Whole Foods and a Trader Joe’s for shopping. Also how much/often to eat fermented foods and do I take pro-biotics too ?
Probiotic yogurt, kefir, and sauerkraut are usually fairly easy to find 🙂 Just make sure you buy the ones that aren’t sweetened and contain lots of probiotic bacteria.
Hi Karole
I just bought sauerkraut and kefir at Whole Foods. The sauerkraut is in the refrigerated section; there are a few different brands, but I personally like The Brinery. And I bought plain goat milk kefir by Redwood Hill Farm (I don’t eat cow milk stuff). I have been drinking 4 ounces of kefir every day, plus a couple tablespoons of sauerkraut every other day. I plan to gradually increase the amounts, as well as add in some other fermented foods – I don’t want to cause myself any problems by eating too much too fast.
I wish you well 🙂
Thank you for all your work, Lisa – there’s lots of very useful information here!
Thanks for all your helpful information! I think its great for people to know all the benefits of fermented foods and what a great benefit it can have on their health. Thank you for sharing!
In preparing water kefir, the longest period of harvest is 4days. If you harvest it in 2days your water kefir is sweet and it means there is still much sugar in it but if you harvest it in 4 days, it tastes like a wine or a beer, this it is well fermented with the least sugar in it.
I bought HEALTH -Ade Call Kombucha . Is this brand bad for candida
Hi there
I am hoping that you would be able to assist me.
I am enjoying your work and have found it immensely beneficial.
However, I am highly sensitive to almost everything i eat and cannot tolerate supplements.
My health is in a bad way.
As I am not tolerant of very much, do you think that fermented food at this stage would be beneficial for me ?
I look forward to hearing from you
Kind regards
Rechelle
Fermented food is beneficial for most people. Start with a small amount and see how you react 🙂