How To Make Your Own Yogurt
Yogurt or kefir should be one of your staples during your Candida treatment plan. The friendly bacteria found in these probiotic foods help to restore your digestive system to health.
They do this by building up your immune system, crowding out the Candida yeast and restoring the correct acidity to your gut. You can eat yogurt, in addition to a course of good commercial probiotics, soon after you begin the strict anti-Candida diet.
Of course we’re not talking about the sugary, additive-rich yogurts that you would normally pick up from your supermarket aisle. These brands rarely contain live bacteria and are often packed full of sugar that will feed your Candida overgrowth.
As part of your new, healthy diet, you need to be eating plain unsweetened yogurt, preferably organic, that is packed full with healthy bacteria. You can find this in the refrigerated section of most supermarkets and health food shops. Even better, you can easily make your own probiotic yogurt at home.
The process of making your own yogurt is surprisingly simple, and it provides an excellent complement to probiotic supplements. It takes several hours, but the preparation time is actually very short. Making your own yogurt is also a very economical process. Once you have your first batch done, you can use it to ‘seed’ the next batch. So after you’ve made your yogurt for the first time, the only ingredient you will need to buy is the milk.
Table Of Contents
What do you need?
- A large pot
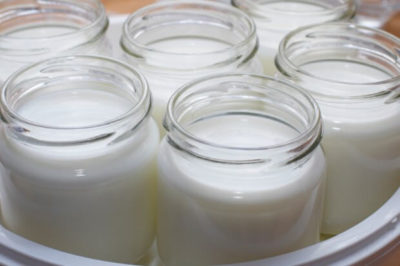
- Glass jars with lids (all sterilized)
- Thermometer
- Full fat milk (low fat milk will make for a very thin yogurt)
- Yogurt starter kit OR some yogurt with live bacteria
Steps to make your yogurt
Step One – Heat the milk to 185 degrees
Pour the milk into your large pot and heat it to around 185 degrees Fahrenheit (85 degrees Celsius). Until it reaches that temperature, you will need to stir the milk constantly to stop it from burning. If you don’t have a thermometer, you’ll know the milk has reached the right temperature when it starts to froth.
Step Two – Cool the milk to 110 degrees
Now cool the milk to 110 degrees (43 degrees Celsius). The easiest way to do this is to place the pot in a sink full of cold water, stirring it occasionally. 110 degrees is the perfect temperature, but in reality anywhere in a 90-120 degree range is fine. So don’t worry if you forget it and the temperature drops a little low. If you are using some previously cultured yogurt instead of a starter kit, you should also take it out of the fridge and keep it at room temperature for a while.
Step Three – Add the yogurt culture
Now is the time to add your previously cultured yogurt or your yogurt starter kit. If you are using yogurt that you previously made, or a good commercial brand with live bacteria, use around one tablespoon per pint of milk. If you are using the starter kit, follow the instructions on the box. Give the milk and yogurt a good whisk so that the live cultures are spread all through the mixture.
Step Four: Pour the milk in the jars and keep them warm
Next you should pour the milk into your sterilized jars and screw on the lids. To speed up the process and help the bacteria do their work, these jars need to be kept in a warm place. The right temperature is around 100 degrees, although this is not crucially important. There are several easy ways to do this. Here are a few options:
- Place the jars in a cooler with some warm water
- Put the jars on your radiator or some other warm spot in your house
- If your oven has a pilot light, you can place the jars there
Step Five: Leave the culture to grow
Depending on how you like your yogurt, you can leave it anywhere between 3 and 7 hours. Less time will give you a thinner consistency and a mild flavor. More time will make your yogurt thicker and give it a tangy, slightly sour taste. It’s really up to you how long you leave it, but bear in mind that it will thicken up more when it cools. When you think the yogurt is ready, move it to the fridge. It can remain here for 2-3 weeks if you keep it sealed. Don’t eat it all – you can use this yogurt as the starter culture for the next batch!
Flavoring your yogurt
Many of us have grown to love the slightly tangy taste of plain, homemade yogurt. For those of you with a sweet tooth however, you may want to sweeten it up a little with some stevia or xylitol. When you reach the later stages of your treatment and start to reintroduce some foods, eat the yogurt with some green apples, blueberries or another low sugar fruit.
For lots more information on the symptoms, causes and treatment of Candida, take a look at my Ultimate Candida Diet treatment program.
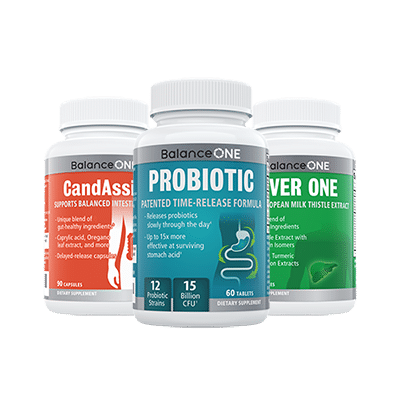
3-Month Candida Elimination Kit Start Your 3-month Candida Cleanse
This Candida Kit contains all the supplements recommended on the Candida Diet:
- LIVER ONE to process and remove the toxins created by Candida.
- CANDASSIST to inhibit and weaken the Candida colonies in your gut.
- PROBIOTIC to replace the Candida yeast with probiotic bacteria.
Plus... the CANDIDA DIET RECIPE BOOK with 50+ low-sugar recipes

Leave a Reply